Hot off the press. I worked through the switch drawings I made during the day and was pretty sure I had reverse engineered it correctly. I just needed to check what a few of the components were so I headed for the 5 volumes of paperwork I found in the boat. Turns out that one set of paperwork actually has the complete set of diagrams for the cabinets. Easy to read and understand and confirmed that I had the majority of the circuits fairly well right.
So next week, all I need to do is connect up the mains, flip the switch and hey presto. A fire no doubt. So maybe not. Perhaps I will do some more tracing. The wiring diagrams with the set of ship wide fuse box diagrams can now be worked through. Even if I am not sure which wire goes where I can see that they wires are all in place and pretty immovable (so nobody could have messed them around). Step 1, label and remove ALL fuses. Then from the fuse boxes check each circuit to make sure it is not shorting. Check the sockets and lighting and then start to replace the fuses. Fingers crossed, no fires.
Sunday 27 March 2011
Radiators gone
No photos today. I had another go at tracing the shore power. This time starting at the generator power control cabinet to see if I could track it back. Thanks to some clever design this is a physical impossibility. It looks very much like they ran the cabling down the walls and into a trench under the floor level of the room. The only part of the trench that was accessible was the top. They then took the blue power control cabinets and put them on top thus sealing in all the wiring. You can see the wires disappear through the hole in the bottom of the cabinet and you can see cables exit the trench at the back but as all the cables look the same there is no way to tell which cable entering exits at any given place. There is no way out of this predicament.
I started to explore (take a peek) at the underside of the generator room. Gulp. I am not sure that there is not a lot of dirty oily water down there. It is hard to see. Further investigation will be needed. There are 'coolant' tanks down there (I was wondering how the generators were cooled). The downside is there will be more pipes to trace. I did note that the underside of the engine room looked pretty rusty. This is not atypical apparently. The electric currents flowing around the generators in the hull can eat you hull really quickly. I have not doubt my hull is fine but this is the only place there is any rust at all in the boat. Just needs inspecting, cleaning of diesel and oil and water and rust proofing and painting.
There are now 5 options remaining. The first four are the same. Take the input power lead from one of the generators and exchange it for mains power. 4 generators, 4 options :-> The 5th, and probably more sensible one is to exchange what appears to be the shore power connections with a new mains feed. But before I do that I have to be really sure it is what I think it is. Standing on a 600 piece of metal containing diesel and sitting in water is probably not the right environment to start experimenting with connecting up mains voltage to various points.
Defeated I turned my hand to some honest labour. I removed all 11 remaining radiators (oil filled electric heater types) and their fireproof board. Labelled up the power sockets the were connected to so I could remember later what those sockets were for. The more unnecessary kit (especially electrical) I can remove the better.
The last job of the day was labeling water pipes. I manage to trace through all pipes in the cabins which were fed from the bathrooms and toilets as well as a number of floor drains. They are all accounted for now. Which means at some point I can start cutting. But probably not before I have planned the alternatives. The pipes cannot stay as they are in the ceiling of the cabins and look a frightful mess. All modern piping will go via a macerator (yet to be planned) and down into the grey water and black water tanks (also yet to be planned). A pipeless set of cabins (or at least smaller pipes that can be hidden in the ceilings I will be fitting) is desirable.
Did a bit of tidying. Mopped and cleaned the old cooker area (with the new porthole above it) to see if there is a leak. Its hard to tell as there was water there from washing the porthole last week. It should be clear if there is a leak now.
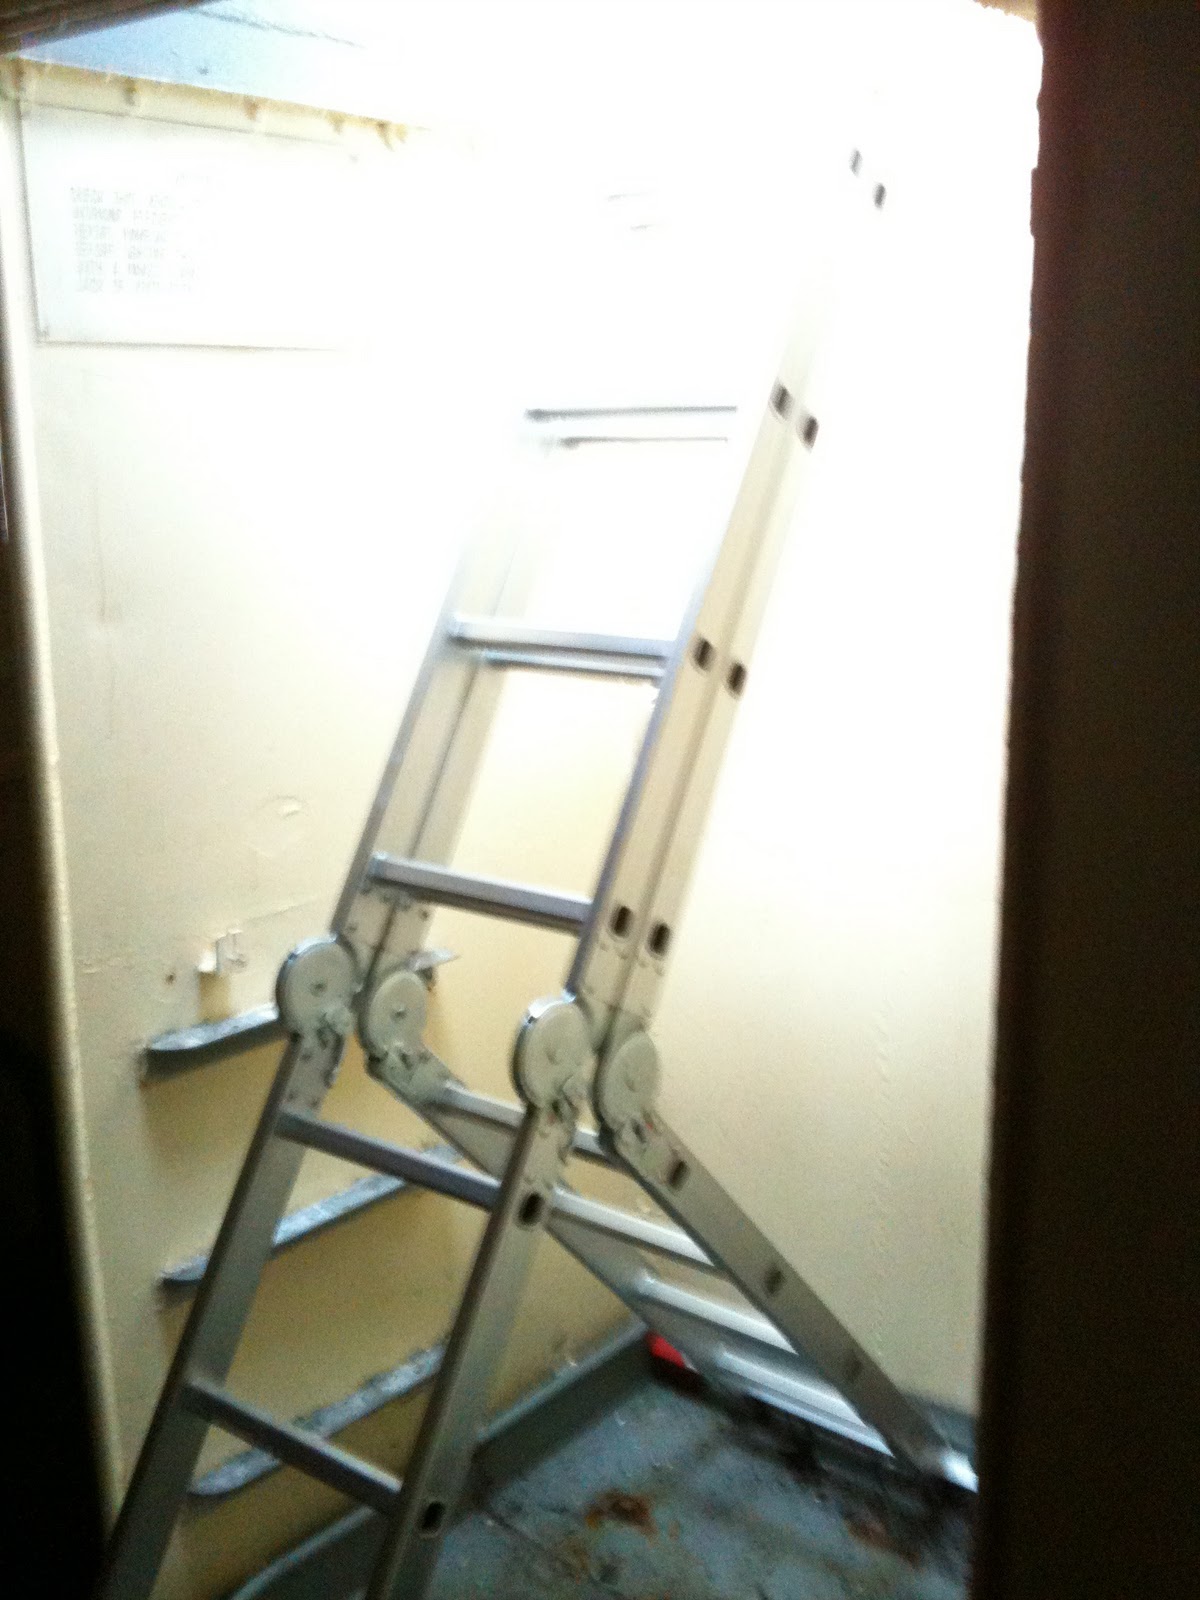
Can't wait to see the gangway up next week. No more ladder! Yeah!
I started to explore (take a peek) at the underside of the generator room. Gulp. I am not sure that there is not a lot of dirty oily water down there. It is hard to see. Further investigation will be needed. There are 'coolant' tanks down there (I was wondering how the generators were cooled). The downside is there will be more pipes to trace. I did note that the underside of the engine room looked pretty rusty. This is not atypical apparently. The electric currents flowing around the generators in the hull can eat you hull really quickly. I have not doubt my hull is fine but this is the only place there is any rust at all in the boat. Just needs inspecting, cleaning of diesel and oil and water and rust proofing and painting.
There are now 5 options remaining. The first four are the same. Take the input power lead from one of the generators and exchange it for mains power. 4 generators, 4 options :-> The 5th, and probably more sensible one is to exchange what appears to be the shore power connections with a new mains feed. But before I do that I have to be really sure it is what I think it is. Standing on a 600 piece of metal containing diesel and sitting in water is probably not the right environment to start experimenting with connecting up mains voltage to various points.
Defeated I turned my hand to some honest labour. I removed all 11 remaining radiators (oil filled electric heater types) and their fireproof board. Labelled up the power sockets the were connected to so I could remember later what those sockets were for. The more unnecessary kit (especially electrical) I can remove the better.
The last job of the day was labeling water pipes. I manage to trace through all pipes in the cabins which were fed from the bathrooms and toilets as well as a number of floor drains. They are all accounted for now. Which means at some point I can start cutting. But probably not before I have planned the alternatives. The pipes cannot stay as they are in the ceiling of the cabins and look a frightful mess. All modern piping will go via a macerator (yet to be planned) and down into the grey water and black water tanks (also yet to be planned). A pipeless set of cabins (or at least smaller pipes that can be hidden in the ceilings I will be fitting) is desirable.
Did a bit of tidying. Mopped and cleaned the old cooker area (with the new porthole above it) to see if there is a leak. Its hard to tell as there was water there from washing the porthole last week. It should be clear if there is a leak now.
Can't wait to see the gangway up next week. No more ladder! Yeah!
Saturday 26 March 2011
2 plumbers plumbing
In desperation I went to 2 plumbing supplier this morning to try and determine what the water piping was. The main plumbing suppliers had no idea. Nothing they had fitted. The smaller supplier had some thoughts on the matter. He thought it was probably American UNF thread (I think). Useful information only to some extent as he also had nothing that would fit. So as usual I resorted to violence. Crushed the end of the pipe in the vice in the engine room and then soldered the end. Should be ok for the temporary fix.
The second job of the day was to map the generator control cabinets with the aim to try and trace where the shore wires come in. It took nearly five hours but I managed to map most of the cabinets. Luckily 4 of the sections (one for each generator) were identical so I only needed to map one. The final one was more complex as it had the distribution panels in. There are literally hundreds of wires but all of them are labelled and numbered. So I wrote down and drew each switch and which wires went in (or possibly out) of them.
The end result was lots of drawings which I managed then to join the dots on. And bingo, found where ( I think) the shore power enters the system. The downside is that I can see where the wires disappear our of the cabinet into the floor and then come up behind the cabinet as a set of painted same size generic cables which in turn go through the roof of the engine room. The issue is I cannot tell which one the cable is that comes out of the other side. What I could clearly tell was that the wires that went into the floor were modern. One red, one blue and one yellow earth. All of them big buggers.
There are two external sockets on the boat. On in the wheel house and one out the back. I dismantled the one out the back only to find it had different (older) wiring. So that socket is not the one. The one in the wheelhouse was likewise aged. This is going to do my head in.
However, if I am right then there is a change that I could simply remove the cables in the cabinet and then wire in the mains bypassing this cable. Unless I can somehow determine which cable it is after it disappears under the floor out of the cabinet I see little option.
Some photos of the cabinets to give you some idea of the complexity.


The gangway is coming along well. It will be up next week and ready for the weekend I have been led to believe.


I took some photos of some odd cages with metal bars in them The bars say Chromalox on them. It appears (most likely) that they are in fact heaters.


Friday 25 March 2011
Its Friday!
It's Friday and I have not achieved the things I wanted to. Best laid plans and all that. But its not all bad news.
1) My super duper industrial Vac etc has been built. Can't wait to get my hands on that. It will enable me first of all to empty the water tanks and inspect them. But I cannot get it on board until I have the gangway.
2) The gangway has progressed and will be up by next weekend. Goodbye to that ladder!
3) I have found a number of companies who can re-line (various approaches and substances) the water tanks. This will be much easier than trying to chop out or build new ones inside.
4) I have found a company that does the DIY spray on insulation. It is far cheaper than other insulation and far more effective (moisture seal so no condensation). I will certainly use this for the living accomodation as although there are walls in place (plywood) there is no insulation behind which explains fully why the place is a fridge everytime I go there.
This weekend will be spent in the engine room. I need to trace and create wiring diagrams for the internals of the power control systems. They are in mint (like new) condition inside and all cables and switches are labelled. Out of the switch labelled shore/generator power comes about 10 cables. I need to find out which ones are inputs and which ones are outputs and try and trace them through. Its complex.
More cleaning is now needed. I need to start securing the outside storage areas and moving tools and junk etc into those. Try and clear up the living accomodation to make it more pleasant. There is no shortage of storage in the boat so it should not be too hard. The weather warming up will mean it should be ok.
I now have my vactan rust remover and some drill fitting wire brush attachments. Probably not for this weekend as that seems to be a job that once started may never end.
Wednesday 23 March 2011
Plumbing new depths of despair
I have never been one for plumbing. Never has worked for me. Having cut off some of the pipes a week or so ago I needed to cap a few ends. I bought 3 different size caps and none fitted. So this weekend I took off one of the screw fittings and a bit of pipe. I have now tried 2 places. Nothing is the same size!
The pipe looks to be about the same size as 15mm (the new standard) but it is ever so slightly bigger (enough that 15mm fittings will not fit). The wall thickness of the pipe is also a lot thicker than modern pipes and I think this is the main issue. But not the only issue. The screw thread on the thingy on the pipe does not fit any metric or imperial measure other thingys!
Damn.
What this means is that none of the cold water piping is usable (or will need some form of soldering). I have spoken to a few people who said not to muck around and just get rid of it or it will drive you mad for ever more. This is good advice if it was not for the fact that all the cold water pipes (the near 15mm size) comes from some really big (and no doubt equally non standard piping) which is not easily replaced.
Sunday 20 March 2011
Let there be light
I was in two minds yesterday about which of the various paint strippers to use on glass. None of them say you can use on glass but given what glass is used for in chemistry it seemed a safe bet that if it was ok for metal it was ok for glass. There is a real mix of options. Some strippers appear to be so dangerous you cannot use inside as if you touch, breathe or it seems even look at its girl friend it will kill you quicker than an east end gangster in a nightclub. But there was one product that seem to be almost completely safe short of actually getting a spoon and eating it. Made we wonder if it was actually going to do the job. Why would anyone buy the dangerous stuff if the safe stuff worked.
This was the cooking area. It had to be photographed with the light on or it was too dark to capture.


View from outside in.


What was odd though was that although the porthole was covered in grease there was nothing on the walls or ceilings. Weird!

I sent an hour looking through the drawings. I have identified nearly every possible wire on paper apart from the shore power feed. So it looks like I have to take the hard route. Identify all other cables and the one left must be the shore power! :-> I was hoping to test the plumbing but before I could use the hand pump I had to cap off one of the cold water pipes. I bought three types of cap. None of them fitted. A job for next week I think.
Discussions with other people on site has led me to the conclusion that even if the tanks are found to be working the difficulty in making them fit for human drinking water may be too difficult. What that means is that I will probably open up two tanks and fit new tanks inside them for fresh water. Then the other two tanks could be used for grey water and black water. Given each tank is just over 1000 gallons, two fresh water tanks even close to that will suffice and tanks of that size for fresh and grey water will last a long time before needing pumping out.
Really high tide today. Probably due to the full moon. Could feel Gannet floating. Its the first time I have felt her move since she was put on the mooring.
This was the cooking area. It had to be photographed with the light on or it was too dark to capture.

This was the outside of the porthole I uncovered yesterday.

The first application of the stripper for 1 hour did a really good job. The scraper just peeled off the soft paint with no problem and no damage to the glass. A second application was used to get rid of the smears of more stubborn paint and some paint in pitting.
Another hour and then I washed it all off and hit it with the window cleaner. But wait, I still cannot see through it. They seem to have applied paint (brown) inside too! Turns out they did not. What they did have was the grease and fat of 60 years of irishman cooking sausages on an open grill.
No joke, I was scraping brown grease which was at least 2mm think across the entire inside porthole. Yuk. All upside down too so the cleaner ran down my arms. Moan moan moan.
The results are worth it. Take a look at the photos below to see the amount of light now available in that area and the views up and down.
View from outside in.

The new clean porthole


Views from inside out. What a blue sky!


What was odd though was that although the porthole was covered in grease there was nothing on the walls or ceilings. Weird!

Discussions with other people on site has led me to the conclusion that even if the tanks are found to be working the difficulty in making them fit for human drinking water may be too difficult. What that means is that I will probably open up two tanks and fit new tanks inside them for fresh water. Then the other two tanks could be used for grey water and black water. Given each tank is just over 1000 gallons, two fresh water tanks even close to that will suffice and tanks of that size for fresh and grey water will last a long time before needing pumping out.
Really high tide today. Probably due to the full moon. Could feel Gannet floating. Its the first time I have felt her move since she was put on the mooring.
Saturday 19 March 2011
Clean up day
It was far too nice a day for heavy work. The day was spent cleaning the main lounge area. To say it was filthy was an underestimate. It probably has not been cleaned for 20 years though so no surprise. The chairs are well beyond saving now. But the table and bench are in excellent condition. I cleaned all cushions, woodwork. walls, and floor. It came up nice I also cleaned the oven. Came up ok, At least now it feels habitable. The porthole glass polished up fine as well.


The afternoon job was to try and get the cover plate off the large porthole. Turned out to be not too difficult. The porthole was covered in red paint. I have purchased some paint stripper. That's tomorrow's job.


The last plate went on the new platform. Also the gangway has been started. May take longer than anticipated due to Dave being busy. Not a lot I can do.


Managed to get some photos of the place next door that burned down.


The best bit of the day was the weather though. Glorious day. The boat was ice cold though in the morning. Way warming outside than inside. The evening was lovely too


Sunday 13 March 2011
Bath wins
A mixed day. The primary job of the day was to tackle the two bathrooms. The baths turned out to be bolted to the floor. Said bolts were very large, rusted and covered in paint, under a bath and behind the legs. Game set and match to bath.
But I did manage to remove the old sinks and pipe work. So not all was lost.

The bathroom floors were raised. But this made your head hit the ceiling (nearly). So by removing the flooring it should be possible to make a walk in shower. Much better.
The other decision to make is whether to keep two bathrooms or merge into one. The issue is they are both long and thing. Given there are 8 cabins it may be better to have both and try and make the shower arrangements work. They should do.


I will need to use Dave to cut the baths out. That can wait until the gangway is done though.
 Managed a few other tasks today. Traced all the water tanks and piping from soup to nuts. It took some time as pipes disappear through walls and you have to go up 2 floors and back down again to try and work out which pipe coming out the wall on the other side is the right one. But it is actually straight forward. 4 tanks with one big pipe connecting them all and connecting to a stump on deck. The other pipe connects all 4 tanks and goes up in two directions. The first goes into the engine room and connects to the water pump. That then pushes water up to main deck height and to the blue pipes I can easily trace. It also goes up to a hand pump which appears to allow the crew to get water without power.
I also had time to look at the cooker. Its a bit old and a bit of a mess. Only the left hand section actually holds wood to burn. The rest is just oven. The chimney is the pipe below. So I traced it to the deck above to see which of the many sticky outy things was the chimney.


And here it is. Bugger. Good job I did not light it!

I managed to find where this hatch went. It turns out to be the escape hatch for one of the cabin sections. What I noted was that many of the hatches and some of the other buildings have good portholes with plates over them. So the plate on this hatch has a great big window. I also found a load of spare porthole glass in one of the front lockers. Useful.

I managed to spend some time in the bow and stern sections. The chain room looks ripe for conversion and knocking through to the bow area. It will provide a huge living space to convert.
The door handles all need some work. Mostly corroded brass. Some have keys jammed in. Will take a lot of work to clean these up but should be worth it.


All the doors are in great condition as well. Worth restoring rather than replacing.

Finally, before leaving, I had a look under the cooker. Surprise. A useful tool. It is the tool to open the various holes in the deck (see below). I was wondering about that. Also, I found that it had the instructions for the ship showing how many light flashes per second and blasts of the horn take place on the ship under normal operation.


All in all a productive day. Really good to spend a bit of time finding out how this lot hangs together. Still did not manage to trace where the shore power comes in. The only way forward it to take off all the million cable ties and trace the cables through one by one. Will need to check each and every cable anyway as there are a number of alarming 'wiring' challenges.
Subscribe to:
Posts (Atom)